First thing first, if you would like to play along with this tutorial, here is a code block to create a database and table:
create database sandbox;

use sandbox;
CREATE TABLE employee_id (
        emp_nm varchar(30) not null,
        emp_id varchar(8),
        b_emp_id varchar(8),
        PRIMARY KEY(emp_nm) );
To check if a table exists in MySql, you can use the INFORMATION_SCHEMA.TABLES table.
Running the following code, produces the results below:
Select *
from INFORMATION_SCHEMA.TABLES
where table_schema = 'Sandbox';
You can use this table with an IF THEN clause do determine how your query responds whether or not a table exists.
SELECT IF( EXISTS(
             SELECT *
             FROM INFORMATION_SCHEMA.TABLES
           WHERE TABLE_NAME = 'employee_id'), 1, 0);
And if I try it with a table name that does not exist:
One of the more common uses I find for this when I need to create a table in a script. I want to make sure a table with same name doesn’t already exist, or my query will fail. So I write a query like the one below.
drop table if exists employee_id;

 CREATE TABLE employee_id (
        emp_nm varchar(30) not null,
             emp_id varchar(8),
             b_emp_id varchar(8),
             PRIMARY KEY(emp_nm) );

INSERT INTO employee_id
       (emp_nm, emp_id)
VALUES
       ('Bob', 'A1234567'),
       ('Lisa', 'A1234568'),
       ('Priyanka', 'B1234567');
Decorators are functions that “wrap” around other functions, changing their behavior without changing the function it self. If you have not seen my Closure lesson, you might want to visit it first (Closure)
If you already read it, let us move forward. Let’s start by building a simple function that simply prints my name:
Now we need to build the decorator function. You may notice it is a Closure
Now let’s us the dec() (decorator) to alter what my_name() returns
By passing the function as a argument through the decorator function, my name is now printed out now with text above and below.
Now we can build another decorator function, and try it out. Notice the output differs from the output above.
Next, notice I can nest the decorator functions together
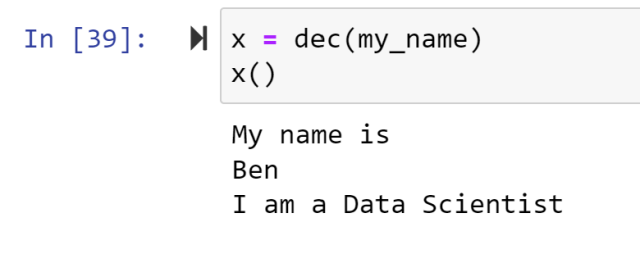
Now, instead of the syntax about, you can simply add the decorator name with a @ in front and it will apply the decorator.
In the second box, you will notice I can stack or nest the 2 decorators I made.
In my humble opinion as a Data Scientist, I think the nesting function would be the most usefulness out of this. Again, I am not a software engineer. They may have more of use for this functionality.
This is a more advanced programming topic, and honestly not one I make much use of myself. However, I got a request to make a lesson on Closures and Decorators. I am going to make it into two lessons to try to make it a bit clearer.
Now to understand closures and decorators, the first thing we need to discuss is nested functions. In programming, nested functions means wrapping a function inside of another function. Here is a very simple example of a nested function:
Now if I just call this with outerFunction(‘Hello World’), the argument x gets passed into the innerFunction which is in turn called by the outerFunction. The result is shown below:
Now why would anyone do this? Outside of just being able to show you that you can? I don’t know. There are reasons for nested functions that involve hiding variables from the code outside of the functions. That is a bit beyond the scope of this lesson. I will try to tackle it when I create my Object Oriented Programming lessons.
For now, let us get on to Closures. Let’s look at the code below:
It is very close to the first example, except notice 2 little changes. First, instead of just calling the innerFunction at the end of the function, we are returning it. Notice there is no () when we return innerFunction
Also notice we are passing the outerFunction to a variable and when we call the var we add () to the end: var()
What we have done now is created an official Closure, let me show you why that matters below.
First, notice I delete the outerFunction. When I try calling it returns an error saying outerFunction is not defined (meaning it doesn’t exist).
But, look what happens when I called var(). It is still there. The closure commits the value to memory when you create it. That is not something that would happen from a normal function or even nesting function.
SO WHY THE HELL SHOULD I CARE????
So why this is cool, and why you might use this in the future, is imagine a function that does processer heavy multi-step calculations. If you just keep calling the function as usual, each time you call it, it has to run the whole chain of calculations again. However, once you’ve called it as closure, you don’t have to run the calculations again, you just get the value.
So, how about a more concrete example
Here I created a closure that uses two functions which each take 1 argument, the arguments are then multiplied together.
Notice, I created a variable called double where I sent the outer function mult_by() a value of 2.
When I call double() I can pass it a value for (y)
I can create as many of these instances as I want. Look below, created one for Triple, and notice double is still functional
I’ll continue this in the Decorators lesson.
Just the main thing to keep in mind about closures, is that they improve program performance by no requiring the function to be run each time.
If you are still a little confused after reading this, don’t feel bad. It took me a few tries to finally understand closures myself.
Data Analysts get a bad wrap. With the advent of the Data Scientist, Data Analysts are often viewed as Data Scientists lite, however I feel that is not the honest case. Truth is, there is a lot of overlap between the two fields. I will dive deeper into what a Data Scientist is in a future article, but just know my opinion is the definition of Data Scientist as a job is still a bit fuzzy and I think the job title may eventually be broken into a few different titles to better define the differences.
Data Analyst
So what does a Data Analyst do?
A lot actually. You could put 10 data analysts into a room and you would get ten different answers to this question. So the best I can do here is make sweeping generalities. As the old saying goes “Your results may vary”
In general, data analysts perform statistical analysis, create reporting, run ad-hoc queries from data warehouses, create data visualizations, create and maintain dashboards, perform data mining, and create machine learning models (yes, ML is not only for data scientists). Their assignments are business driven. A data analysts is either embedded with a business unit (financial planning, fraud, risk management, cyber security, etc.) or working in a centralized reporting/analytics team. They use their skills to provide reporting and analytics for the business.
Tools used by Data Analysts
SQL – MySql, SQL Server, Oracle, Teradata, Postgres – whether simply querying a data warehouse or creating and managing a local data mart, data analysts need to be advanced SQL programmers
Visualization tools – Tableau, Qlik, Power BI, Excel, analysts use these tools to create visualizations and dashboards
Python/R – Data analysts should be familiar with languages like Python or R to help manage data and perform statistical analysis or build machine learning models
Spreadsheets – Excel, Google Sheets, Smart Sheets are used to create reports, and pivot tables used to analyze the data
ETL tools – SSIS, Alteryx, Talend, Knime, these tools are design to move data to and from databases, CSV files, and spreadsheets. Until the data is in a usable format, analysis cannot be performed.
Educational Requirements
Typically a data analyst position will ask for a bachelors degrees, preferably in computer science, statistics, database management or even business. While the barrier to entry for a data analyst job is generally not as high as a data scientist, that does not mean you cannot make a meaningful and well paid career as a data analyst. Also, the demand for data professionals seems to keep going up and up and it most likely will for the foreseeable future.
We are using a module that does not come with the Anaconda distribution. To get this code, open up your Anaconda Prompt and type the following code:
> pip install pyqrcode
Next, you will import pyqrcode into python. Also, since the output of this program will be a png picture file, I am running pwd to determine where on my machine the file will be saved.
Next pick a URL you want your QRCode to go to. I chose my website. I assigned my website address to a variable url.
Then, using the pyqrcode module and its method create(), place your variable in the parenthesis ().
Note printing the QR code you created will not display it, but it will give you the basic information on it. To turn it into a QR code, we will need to covert it to a png.
*Note: Some of you may need to download the png module if you get an error. Just go to pip install png and add import png to the top of the script.
Otherwise, just give you file a name, and scale — the larger the scale, the larger your QR code will be.
Finally, go to your directory where the file was saved and open it.
Scanning the QR Code below should take you to my website’s main page.
For your first project in the course, I am giving you the code below. The code includes 3 lists of varying size. These lists represent the line items on a bill.